Introduction to Microsoft Forms - Free Forms Tutorial for Beginners
Getting Started with Microsoft Forms Free Tutorial
This free Microsoft Forms tutorial will give you an introductory overview of creating a survey in Forms, including setting up your first Form and getting the most out of the functions and features available with the Question options which Forms provides. Plus there is a brief guide at the end which walks you through the options for distributing your forms.
The great news is that creating surveys with Microsoft Forms is really straightforward and it won't be long at all before you're sending out professional surveys to your audiences and participants.
Difficulty: This is a beginners level Microsoft Forms tutorial and no previous knowledge of Forms is needed.
This nine-part guide to Microsoft Forms does not cover quizzes, branching scenarios or the integration of your Forms with SharePoint, Power BI or Power Apps. The tutorial also doesn't cover working with responses. If you would like to learn more, we can happily organise a Microsoft 365 training course tailored to your needs.
We really ❤ helping organisations to master Microsoft 365. Our only question is: Will it be yours?
Call 0844 493 3699
Or email info@foursquaretraining.co.uk
Creating your First Survey in MS Forms
Go to the App Launcher in Microsoft 365 and select All Apps.
Click on the Forms icon.
Now that we have opened Forms its time to create our first survey.
When you open Forms you have a range of options. You can create a New Form, or a New Quiz. Or, you can select one of Microsoft's Form templates such as the Employee Satisfaction Survey. There are also a range of premium templates which come with Microsoft personal and business plans. In this lesson we are going to create a new form from scratch.
Click on the New Form icon and let's get started.
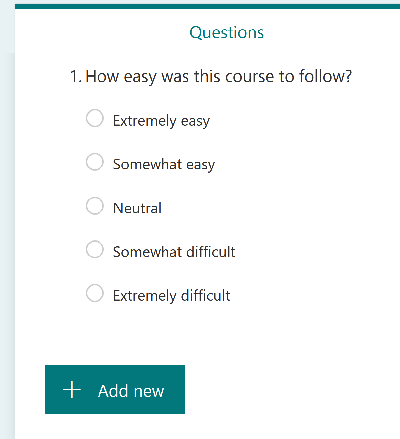
We are presented with an Untitled Form in the questions tab with just an Add New button.
The first thing to do is to add our title and heading, so click on the 'Untitled Form' section.
Once our 'Untitled Form' is open you will see that it has three sections. The title, the description and also an image icon.

1) Write your title and then add your description.
2) Click on the Image icon.
In the Add Image section you can see that Forms gives us a range of options. We can either perform an image search in Microsoft Bing, add an Image that you have stored in the Cloud on OneDrive, or you can upload an image from your PC. Do be aware that if you choose an image that you find on Bing, the chances are that it will not be free for commercial use, so unless you have permission to use an image our advice would be not to. As an alternative you can find a wide selection of free for commercial use images on websites such as Pixabay.
In this example we are going to upload our logo from our local PC, so we select the Upload option and navigate through our folders to find the image that we want to use.
Once you have selected your image, you will see that it now appears to the left of your title.
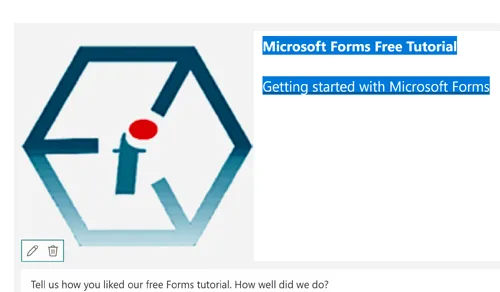
You can see that we now have a range of options.
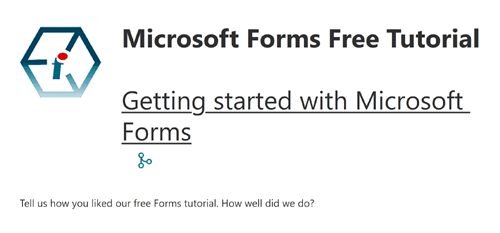
If you look to the top right, you will see that we have made the second line of our title underlined. If you want to format your title text you can use the shortcut keys CTRL+B, CTRL+I and CTRL+U, for bold, italic and underlining. Or, put your mouse over the text you want to edit and click the left button on your mouse twice to open up the formatting options.
There is also plenty of space to make your title much longer (across multiple lines) if you need to add more detail, such as a date, a venue or other information.
If you look to the bottom left you will see that we also have options for changing our image, and that we can either edit it or delete it. Using the zoom icons, you can make your image bigger and you can also add alternative text for screen readers, to describe your image. Unfortunately, you can not reduce the size of the image you have uploaded to a size lower than that you started out with.
Once you have finished, click away from the title section of your Forms survey to see the finished result.
Now we are ready to get going creating our questions for our Microsoft Forms survey.
Click on the 'Add New' icon and you will see that we have a range of options which we shall work through one-by-one.

1) The Choice Option
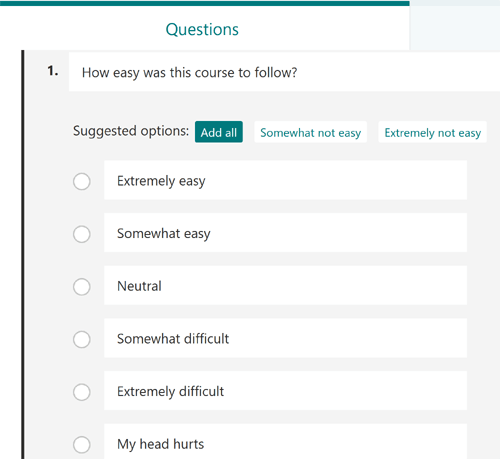
The great thing about the Choice option in Microsoft Forms is its smart features. For instance, type in your question and Forms will give you some suggested options based upon the question that you type. Forms is basically doing the work for you.
In this instance, with our question 'How easy was this course to follow?', Forms anticipates potential answers to this question and gives us a range of five options which we can select for our answers range:
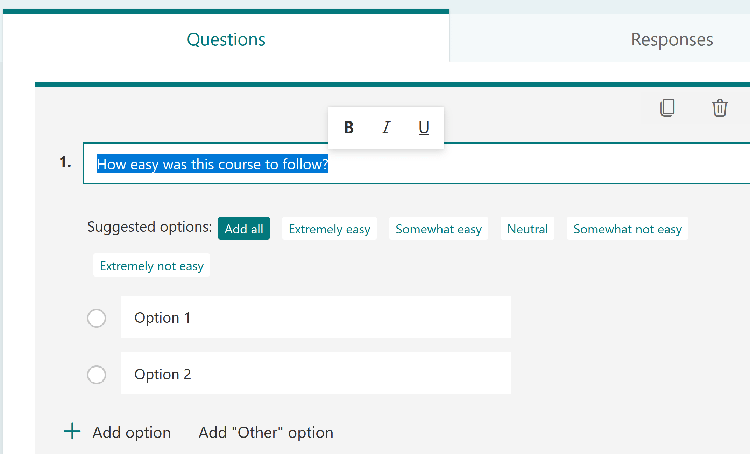
We can either select some of the suggestions that Forms makes, accept them all, or we can write our own responses manually. In this instance, we selected 'Add All'.
As you can see, you can also format your question as bold, italic or underlined.
Some of the options that Forms has provided read more naturally than others. For instance, 'extremely easy' and 'somewhat easy' read much better than 'somewhat not easy' and 'extremely not easy'. Don't worry, we can edit these.
Once you have accepted the suggestions that Forms makes you can still edit them. So, in this instance we are going to change a few of the Forms' suggestions to make them read more naturally.
We can also add more options using the 'Add' option, or add an 'Other' option which is something like saying 'not applicable'. We are going to add a sixth manually entered option.
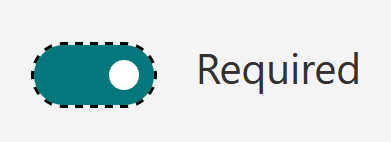
Finally, we want to make this question compulsory and we can set this by using the 'Required' button slider. The default setting is for your questions to be optional so you will need to remember to use the 'Required' button for each question that you want to make compulsory. When you select 'Required' on the slider, you will see a red asterix appear on your question, telling the participant that an answer to this question is required.
Duplicating Questions in Microsoft Forms
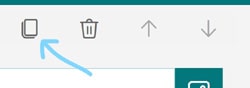
Now you know that you can manually edit your questions once you have accepted the suggestions made by Forms, it is worth knowing about the Copy Question button. This is the icon to the left of the delete button.
Once you copy the question you will get a duplicate of your original question which you can then edit to save you time. In this instance we have simply edited the question section and re-used the same answers.

2) The Text Option.
As we did before, go to the 'Add New' button and this time select the 'Text' option. This option gives your survey participants the opportunity to add their own comments and would usually go at the end of your Forms survey. You will notice that the 'Text' question is the second item along in the options so we will need to look at how to move the 'Text' option to the end of the survey once we have created it.

At the top right of the form you can see that there are up and down arrows. You can use these to move this option up and down within the form so that you can re-position it to where you want it to be within your questionnaire. You can do this at any time during your creation of the quiz, but its usually better to wait until you have added all your questions before you finalise your organisation of them.
If you look at the bottom of the Forms survey you can also see that you have the option to let your participants give a long answer to this question. Unless, you want your participants to write very long answers indeed you might want to avoid this option. The short answer gives participants the opportunity to use 4000 characters in their response, whereas the long answer option might as well be unlimited since it gives you up to 200,000 characters.
With this in mind, it's worth mentioning some of the limitations of MS Forms at the time of writing. When typing out an answer in the 'Text' option your participants cannot see their character count and thus it can be easy for them to go over the limit. Nor can you set limits with any degree of granularity. Having a choice of only up to 4000 characters or up to 200,000 characters can be awkward if you want to import responses into a database or the nature of your survey requires short answers.
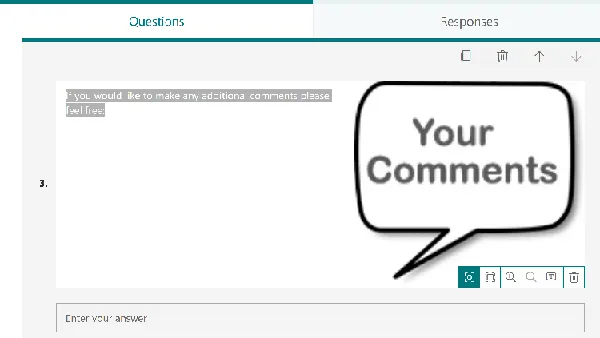
Now look at the green media icon to the right of your question. We haven't yet explored this particular Forms icon in our previous options so let's take a look now.
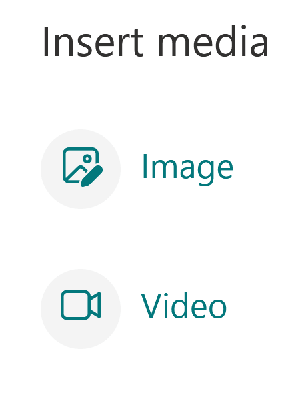
This is the 'Insert Media' icon. When you click on this icon you will see that you get an option to 'Insert Media' including either an image or a video. In this instance we are going to add an image using a picture of a simple speach bubble that I created in PhotoShop.
You might want to reduce your image size before importing it into Microsoft Forms, because the edit options only allow you to increase the size from the original image size. If the image that you upload is too big then you can always delete it from Forms, re-edit it, re-size it or crop it in Microsoft Photos and try again. Don't forget to add some alternative text so that your image makes sense to screen readers.
The 'Text' option in Microsoft Forms also has some additional settings that its worth knowing about.
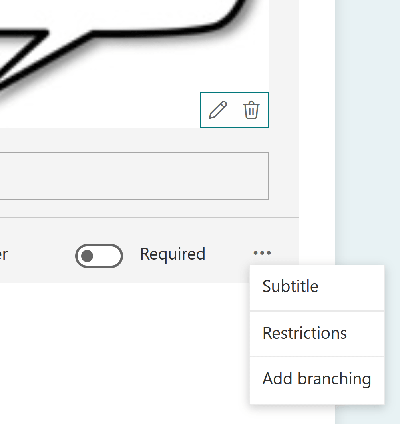
We have three options here, Subtitle, Restrictions and Branching.
Forms Text Option Subtitles
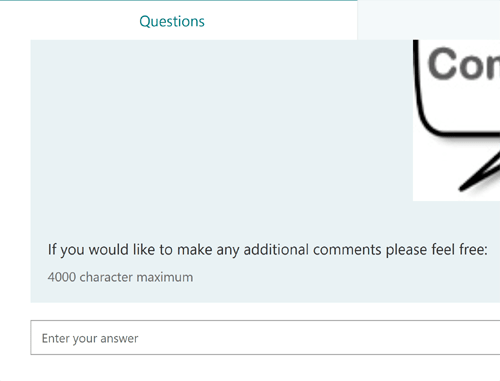
The Subtitle option is pretty self-explanatory. Click on this icon and a dialog box opens which allows you to insert a subtitle beneath your title.

When you select the subtitle option on any question this then gives you the opportunity to add subtitles universally across all of your questions; both ones that you have already created and survey questions that you will add in future. If all of your questions don't need subheadings this doesn't matter since on the final survey form only the subtitles that you enter will be visible.
Our 'Text' question subtitle informs the participant that the word limit is 4000 characters.
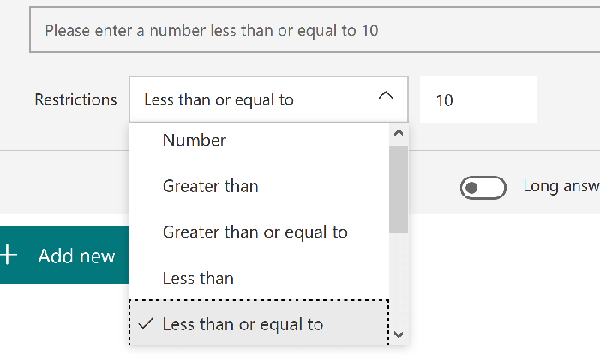
Forms Text Option Restrictions
The Restrictions Option is useful for when you require your participants to give numerical answers to your question. So for instance, for the question 'How many hours should there be in a working day?', you can set parameters for the number answer given, as 'Greater Than', 'Greater Than or Equal to', 'Less than' or 'Less than or Equal to' and 'Equal to' for instance.
Forms Text Option Branching
The branching option allows you to provide navigation to another point within the form. Once you add branching, even in just one question it is applied universally across all of your questions. Thus, it makes sense not to add branching until you have added all the questions on your form so that you can contextually redirect your participants based upon their answers using logical conditionality. Branching in Microsoft Forms is not covered as part of this tutorial and requires a whole lengthy module all to to itself. If you would like to find out how to use branching, you can always talk to us about tailoring a Microsoft 365 course for you.

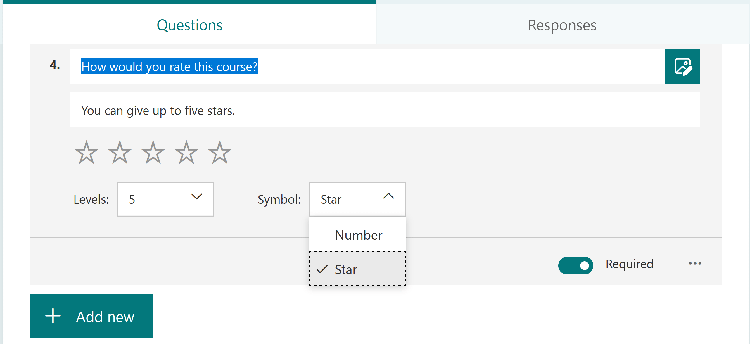
3) The Rating Option.
The Rating Option is the third item along when you select the 'Add New' button. This option allows your participants to give a rating of your question from one to ten with a choice of giving a numerical rating or a star rating. You can set the number of rating levels available to your participants anywhere between a minimum of 2 and limit of 10. The default is five levels.
The Forms Rating option is pretty straightforward with features that we have already encountered such as 'Insert Media', move Up or Down, 'Copy Question', 'More Settings' and the 'Required' slider. Under 'More Settings' however there is an option that we have not yet encountered and this is the 'Label' option.
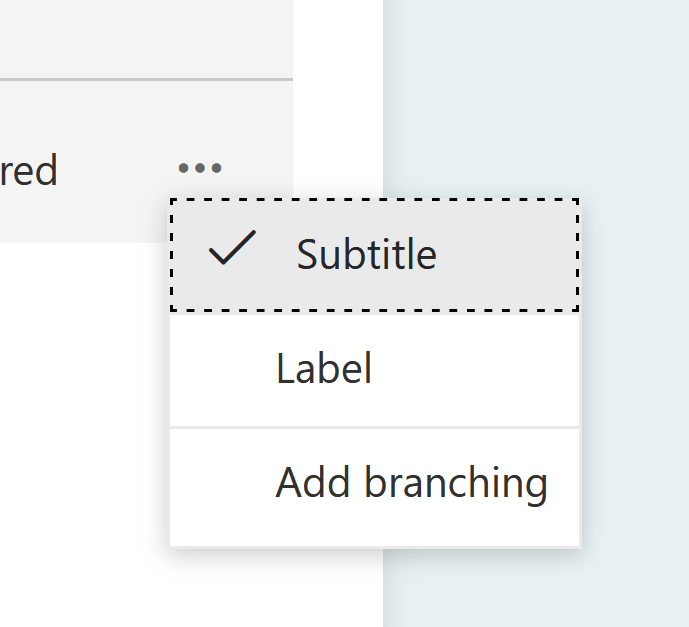
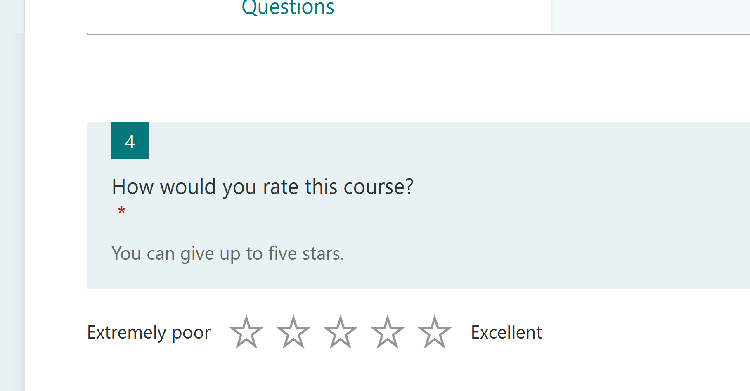
Open the Ratings Label and you get an option to add a text benchmark for the top and bottom ratings to explain to the participants what these scores mean. This provides them with helpful context for the ratings that they award.
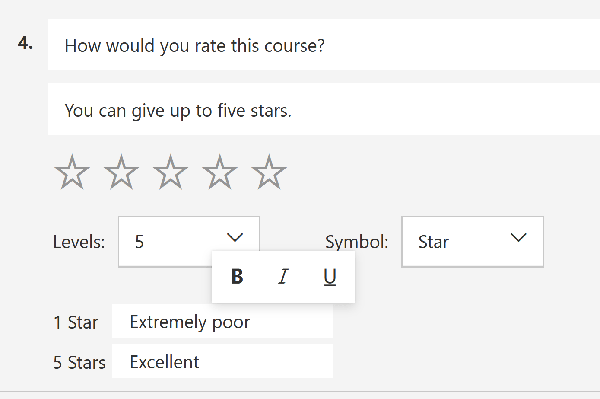
In this instance we have decided to call our labels 'Extremely poor' for one star and 'Excellent' for five stars. Put your mouse over one of the labels and click your right mouse button twice and formatting options will appear for Bold, Italic and Underline.
The finished rating:
4) The Date Option
The 'Date' option is the fourth item along when you click on the 'Add New' Button. The 'Date' option allows participants of your survey to answer questions which require them to provide an answer using a calendar date picker. In this instance, we are going to ask the question 'When did you read our Microsoft Forms Tutorial?'
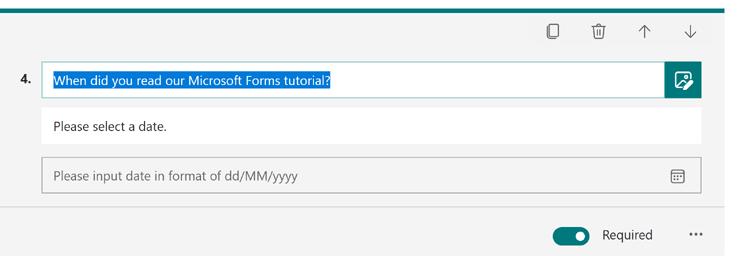
There aren't any features that we haven't already encountered here and the participant simply selects a date from the date picker in order to answer the question. As usual, if you want the answer to be compulsory, use the 'Required' slider.
5) The Ranking Option
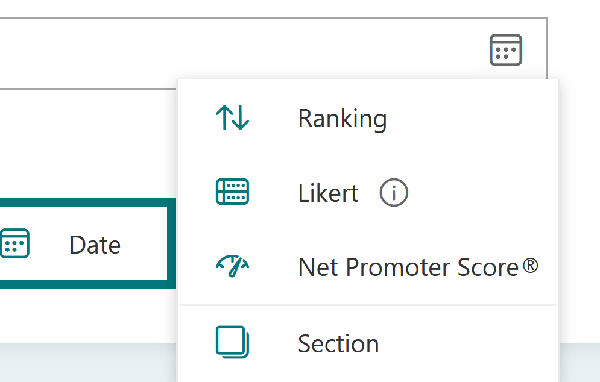
When we click the 'Add New Button' and look at the far-right-end of the options available, we can see that the menu is extensible and if you click on the down arrow you will see that we have four more options to cover, the first of which is 'Ranking'.

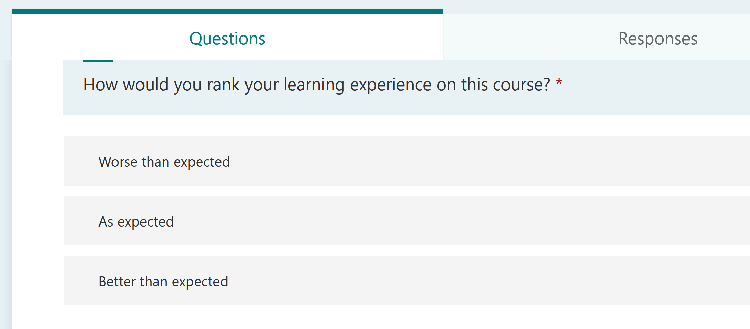
Where we might expect that Microsoft Forms might suggest smart answers to the Ranking question that we ask here, there don't appear to be any for the Ranking option (at least on none of the questions that we experimented with). So, you will have to manually type both your questions and your answers here. We added three possible responses:
6) The Likert Option
The Likert option is not self-explanatory, so this one has a helpful little information icon next to it to tell you what this question option is for. When you put your mouse over the information icon you get an information popout which tells you that Likert is 'used to gauge user attitudes and opinions about a topic'. Sound useful?
Click on the Likert option to open it up.
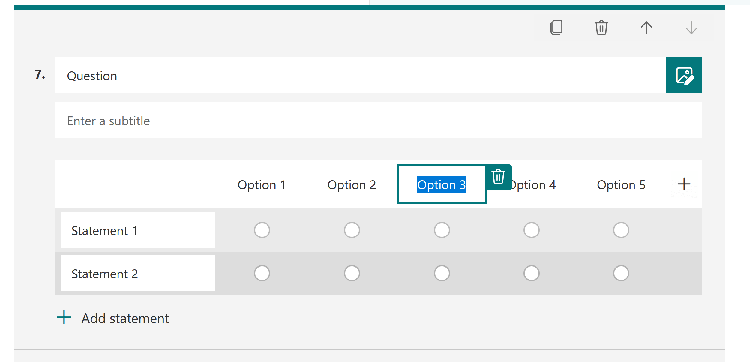
Likert is a bit different to the question options that we have seen before in that this time we have both columns and rows of information to complete. This suggests that we might want to spend a bit more time planning the right question to ask and also the sorts of responses that we are looking for.
Likert is very suited to yes/no questions which then enable you to find out either why the participant entered the answer that they did, or how they feel about the subject overall in combination with their yes/no response.
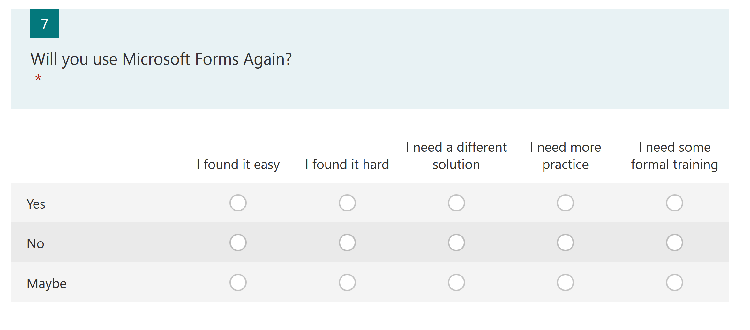
We chose the question 'Will you use Microsoft Forms again?' This enabled us to find out not only how many participants would use Forms again and how many wouldn't, but why as well. Knowing why is a very powerful tool when it comes to evaluating the needs, aspirations and feelings of your audience and even the temperature of their engagement with the topic.
In the following example, we opted for simple Yes, No and Maybe options for the rows, combined with some options in the columns to give an indication of what the audience thought.
The limitation with Forms Likert questions here is that you can't re-order the columns or rows by dragging and dropping once you have typed them out so you will need to manually delete your items in columns and rows or delete the text in them if you don't get it right the first time around. With a bit of playing around and copying and pasting it doesn't take too long to re-order everything though.
As you can see from our finished Likert, Likert can get quite complex and already with this small one which we created there are fifteen different possible outcomes, or answers to the question.
7) Net Promoter Score Option
The third option in the dropdown menu is Net Promoter Score.
The Net Promoter Score option is one of the most useful of all the Microsoft Forms questions options. If you use the Net Promoter Score (NPS) across an entire form, it becomes very straightforward to extract very useful information from your results which give a visually simple and meaningful result when you're analysing performance. The ease with which meaningful metrics can be ascertained from the Net Promoter Score really boils down to the fact that it uses a decimal system with a score out of ten for each question. So, for instance, if my form contains 10 Net Promoter Score questions and the average score is 8/10 or 80 percent we can tell immediately that this is a high level of performance.
And, once you get multiple respondents to your survey, the simplicity cascades through when you start calculating overall averages. The maths is simple, but gives very meaningful results which an organisation can look at as an overview before examining more granular information. It's a great tool to enable you to get top-down results.
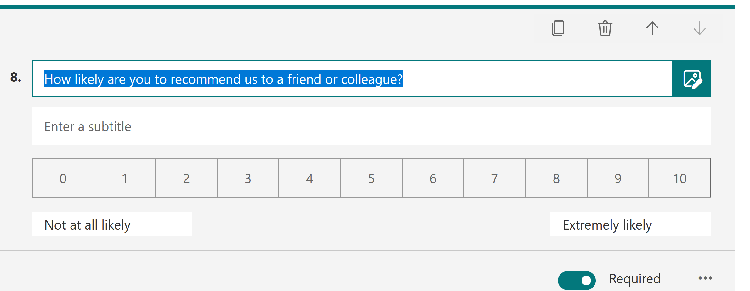
When you open up the Net Promoter Score option, Forms inserts a default question for you which is 'How likely are you to recommend us to a friend or colleague?'.
Whilst this default question is a great question itself, it doesn't really do justice to the sheer versatility and power of the Net Promoter Score. In fact, if we had been consistent and used the Net Promoter Score question for all of our questions which required a rating, the overall statistics that could have been retrieved from this form would have made much more sense, and contributed much more to collecting meaningful and scaleable data which could be understood in a nutshell.
Finally, it's worth pointing out that with the Net Promoter Score you can edit what the scores at the extreme ends of the scale mean in the edit boxes provided. The defaults are 'Not at all likely' and 'Extremely likely', which match up with the default question.
We have now completed our survey in Microsoft Forms. If you need to rearrange your questions remember to use the up and down arrows to re-order your questions.
Note 1: This is the point at which we would start to look at branching in Microsoft Forms if we were taking this tutorial further right now. Remember, you should only start working with branching in Forms once you have finished adding all of your questions.
Note 2: With some plans you will also see an 'Upload Media' option in the extended list of more options. The file upload option is available only if you're using OneDrive for Business AND also only sharing with internal users. Its a cyber security thing to prevent just anyone uploading files to your tenant. Microsoft have been rolling out the 'Upload Media' option since around 2019 but its coverage still seems quite patchy.
Now that I've completed my Microsoft Form's questionnaire what can I do with it?
We're only going to cover a couple of options here, but we'll give you a list of some further possibilities at the end.
8) Preview your Form
The first thing to do when you have completed your Microsoft Forms form is to preview it. Proofread and check your work here and make sure that everything looks okay. Go to the top right-hand-side of the screen and select Preview.

Also try answering the questions yourself in the Preview view to check how user-friendly your form is and that it makes sense.
To exit the Preview view, click on the back button at the top left-hand-side of the page.
9 Distributing Your Form:
In order to distribute your form questionnaire to your audience go to the Send button at the top right-hand-side of the page.
You have a couple of options here. Let's break them down.
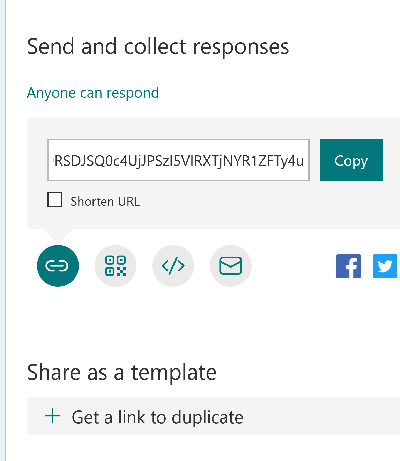
Copy and Paste the Forms Survey Link
The default option is to copy a link to the form which you can then distribute to all the recipients. This is a flexible option since you can put the link just about anywhere you want, whether it is advertised internally via Microsoft Teams or elsewhere within Microsoft 365, emailed to the participants or even shared on a social media site. However, this is a very manual option.
If you click on the shorten URL checkbox this will save space on platforms where you perhaps only have a limited amount of characters to play with.
Send your Form as a QR code.
The second option along is to get a QR code for your form which can then be sent out to the participants which they can access on their mobile devices and tablets by scanning the code to gain access to the form.
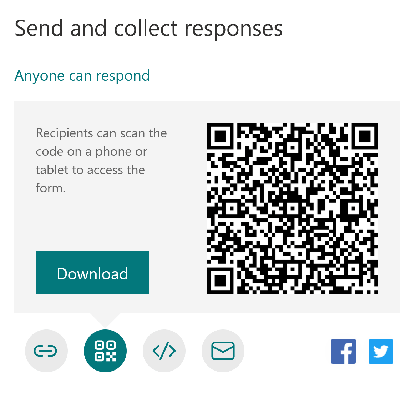
You could also put the QR code up on a website or internal SharePoint Page or Teamsite.
Click the Download button and select where you want to save the file.
When you download the QR code it will be saved as a .png image (Portable Graphics Format) which makes it very flexible. It can be distributed as an email attachment, via text message or instant message, shared on Microsoft Teams or within SharePoint. The options are endless.
The file size of our QR Code was 31kb which makes it very portable indeed.
Embed your Form in a Webpage or Sway.
The third option along is to embed your Forms survey in a webpage or Sway. To get the embed code, simply click the embed icon and copy the code.

a) Webpage
Paste the embed code into the source code of your webpage where you want the survey to appear.
The default dimensions are set to 640px wide and 480px high. You can change this, but remember that the minimum dimensions you can use are 350px*480px.
b) Sway
To embed your Form into a Sway go to the App Launcher icon on the top left-hand-side of the screen, go to All Apps and scroll down to Sway.
Select the Sway that you want to use or create a new Sway.
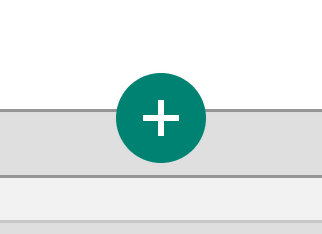
When you have your Sway open, select the card in the Sway that you want to use. Go to the plus icon in the bottom middle of the Sway.
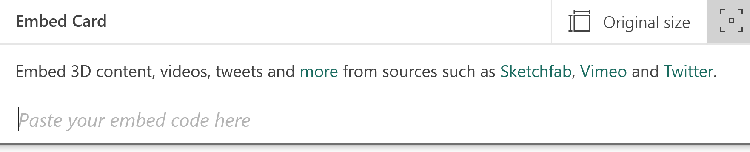
Select 'Media' and choose the 'Embed' option.
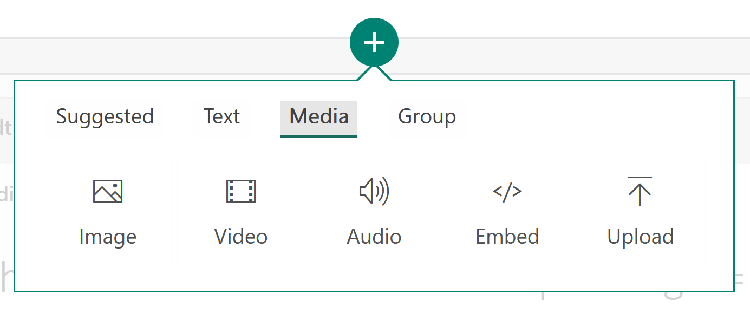
In your Sway card you will see some grey text which says 'Paste your embed code here'.
Paste your code, and you're now ready to go.
Email your Form
The fourth option along is the email option. Click on the email option and this will open Microsoft Outlook.
Choosing the email option will send a link to your form, not the form itself.
Whilst there are ways to embed a Microsoft Forms form into an email we don't recommend it as your email is likely to get designated as spam and might fail to reach your recipients; especially if they're external to your own business.
Post to Social Media
You can also post your survey on social media sites such as Facebook or Twitter by clicking on the icons. If this is to be a general form for which you want public participation or to engage your friends or followers then this might be a good option. However, the icons for the social media options are much smaller than the icons for the other options, which perhaps indicates that Microsoft recognises that this might not always be the most willing or targeted audience for your form and might be less willing to participate than colleagues and teams that share common goals and objectives with you.
Share as a Template.
The last option for Sharing your form on the 'Send' panel (although not the last option for sharing by any means), is the 'Share as a Template' option.
You should use this if you're the person responsible for creating the form survey, but not the person responsible for distributing it.
You can send a template for someone else to then send out to the participants this way, giving them the same control over the Form and its sharing options as you have yourself.
Copy 'the Share as a link' code and send it on to your survey distributor/s. This essentially gives them the same admin rights over the Microsoft Forms survey you have created as you have yourself.
Print your Form
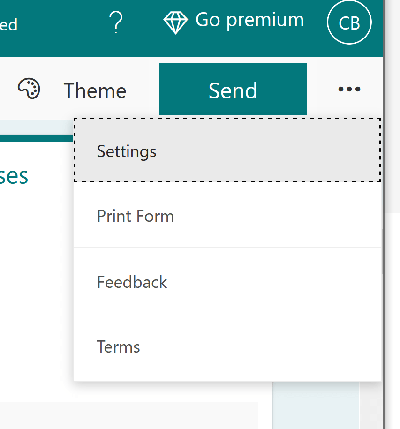
In order to print your survey to distribute in hardcopy go to the very top-right icon on the screen (the three horizontal dots) and click to open up the dropdown menu. Select 'Print Form', check through the print preview and decide whether you want your form survey to be in landscape or portrait layout and click 'Print'.
We really ❤ helping organisations to leverage the capabilities of Microsoft 365. Our only question is: Will it be yours?
Take one of our Microsoft 365 courses to discover more in-depth methods of distributing your survey and also find out how to:
- Embed your Forms survey in SharePoint
- Embed your Forms survey in Power BI
- Embed your Forms survey in Power Apps
Now let's have a look at the survey that we created in Microsoft Forms. Feel free to complete it and send us your feedback on this introduction to creating a survey in Microsoft Forms.
To book a training course simply call 0844 493 3699, or email info@foursquaretraining.co.uk
Microsoft 365 Courses North West of England Region
Microsoft 365 Courses Lancashire, Greater Manchester and Merseyside: Bolton, Lancaster, Liverpool, Manchester, Preston, Warrington, Altrincham, Barrow-in-Furness, Blackburn, Oldham
Microsoft 365 Courses Cheshire and Wirral: Birkenhead, Chester, Stockport, Ellesmere Port, Knutsford, Wallasey, Runcorn, Macclesfield, Crewe
Microsoft 365 Courses North East of England Region
Microsoft 365 Courses Northumberland and Tyneside: Alnwick, Newcastle-upon-Tyne, Morpeth, Hexham, Berwick-upon-Tweed
Microsoft 365 Courses County Durham: Durham, Sunderland, Stockton-on-Tees, Darlington, Gateshead, Washington, Hartlepool
Microsoft 365 Courses Yorkshire and the Humber Region
Microsoft 365 Courses West Yorkshire: Leeds, Bradford, Halifax, Huddersfield, Brighouse, Wakefield, Shipley, Dewsbury, Bingley
Microsoft 365 Courses North Yorkshire: York, Harrogate, Scarborough, Whitby, Northallerton, Middlesbrough
Microsoft 365 Courses South Yorkshire: Sheffield, Barnsley, Doncaster, Rotherham, Worksop
Microsoft 365 Courses Humberside / East Riding of Yorkshire: Kingston-upon-Hull, Bridlington
Microsoft 365 Courses East Midlands Region
Microsoft 365 Courses Northamptonshire: Northampton, Corby, Kettering, Wellingborough
Microsoft 365 Courses Lincolnshire: Lincoln, Market Rasen, Grantham, Sleaford, Boston, Cleethorpes, Scunthorpe, Grimsby
Microsoft 365 Courses Nottinghamshire: Nottingham, Mansfield, Worksop, Newark-on-Trent, Retford, Southwell, Long Eaton, Alfreton
Microsoft 365 Courses Derbyshire: Derby, Chesterfield, Ilkeston, Swadlincote, Buxton, Matlock, Ashbourne
Microsoft 365 Courses Leicestershire: Leicester, Loughborough, Hinckley, Melton Mowbray, Coalville, Lutterworth
Microsoft 365 Courses West Midlands Region
Microsoft 365 Courses West Midlands county & Warwickshire: Birmingham, Coventry, Nuneaton, Rugby, Solihull, Stratford-upon-Avon, Warwick, Wolverhampton, Walsall
Microsoft 365 Courses Staffordshire: Cannock, Lichfield, Stafford, Stoke-on-Trent
Microsoft 365 Courses Worcestershire: Dudley, Evesham, Kidderminster, Stourbridge, Halesowen, Malvern, Worcester
Microsoft 365 Courses South
Microsoft 365 Courses Northamptonshire: Northampton, Peterborough, Corby, Kettering, Wellingborough
Microsoft 365 Courses Cambridgeshire: Cambridge, Peterborough, Wisbech, Ely, March, Whittlesey, Chatteris, Linton
Microsoft 365 Courses Buckinghamshire: Aylesbury, Milton Keynes, Slough, Buckingham, High Wycombe
Microsoft 365 Courses Oxfordshire: Oxford, Banbury, Witney, Bicester, Henley-on-Thames, Carterton, Thame
Microsoft 365 Courses Hampshire: Winchester, Southampton, Portsmouth, Bournemouth, Basingstoke, Newport
Microsoft 365 Courses Hertfordshire: Hertford, Watford, St. Albans, Hemel Hempstead, Stevenage, Hatfield
Microsoft 365 Courses Bedfordshire: Bedford, Luton, Dunstable, Leighton Buzzard, Biggleswade, Sandy
Microsoft Office Courses Greater London Region
Microsoft 365 Courses Berkshire: Reading, Bracknell, Abingdon, Maidenhead, Newbury, Windsor, Wokingham
Microsoft 365 Courses London Central: London, Camden, Hackney, Hammersmith, Haringey, Islington, Kensington, Chelsea, Lambeth, Southwark, Wandsworth, City of Westminster
Microsoft 365 Courses London East: Bethnal Green, Bow, Chingford, East Ham, Hackney, Manor Park, Plaistow, Stratford, Victoria Dock, Walthamstow, South Woodford
Microsoft 365 Courses London South West: Chelsea, Clapham, Earls Court, South Kensington, Stockwell, West Brompton
Microsoft 365 Courses Battersea: Barnes, Mortlake, Putney, Streatham, Wandsworth, Wimbledon, West Wimbledon
Microsoft 365 Courses Paddington: Chiswick, Ealing, Hammersmith, Kensington, Maida Vale, North Kensington, Notting Hill, Shepherds Bush, West Ealing, West Kensington
Microsoft 365 Courses South West
Microsoft 365 Courses Somerset: Taunton, Bath, Bridgwater, Weston-super-Mare, Yeovil, Wells, Glastonbury
Microsoft 365 Courses Dorset: Dorchester, Poole, Sherborne, Shaftesbury, Wimborne Minster, Weymouth
Microsoft 365 Courses Wiltshire: Trowbridge, Salisbury, Swindon, Chippenham, Devizes, Marlborough, Warminster
Microsoft 365 Courses Gloucestershire: Gloucester, Bristol, Cheltenham, Stroud, Cirencester, Tewkesbury
Microsoft 365 Courses South East
Microsoft 365 Courses Norfolk: Norwich, Great Yarmouth, King's Lynn, Dereham, Cromer, Hunstanton
Microsoft 365 Courses Suffolk: Ipswich, Bury St Edmunds, Lowestoft, Felixstowe, Sudbury, Haverhill, Bungay
Microsoft 365 Courses Essex: Chelmsford, Basildon, Romford, Southend, Colchester, Harlow, Brentwood, West Ham
Microsoft 365 Courses Kent: Maidstone, Canterbury, Bromley, Rochester, Margate, Folkestone, Dover, Greenwich
Microsoft 365 Courses East and West Sussex: Chichester, Brighton, Worthing, Crawley, Hastings, Eastbourne, Bognor Regis, Horsham
Microsoft 365 Courses Scotland and Wales
Microsoft 365 Courses Scotland: Aberdeen, Dundee, Dunfermline, Edinburgh, Fife, Glasgow, Inverness, Livingston, St Andrews, Stirling
Microsoft 365 Courses Cymru (Wales): Aberystwyth, Cardiff, Monmouth, Swansea, Wrexham
Microsoft 365 Courses Northern Ireland
Belfast, Derry, Lisburn, Newtownabbey, Bangor
Microsoft 365 Courses British Dependencies & Self-Governing Territories
Bailiwicks of Jersey & Guernsey, British Virgin Islands, Cayman Islands, Gibraltar, Bermuda
Back to top